


 Get A Quote
  (224)366-0290
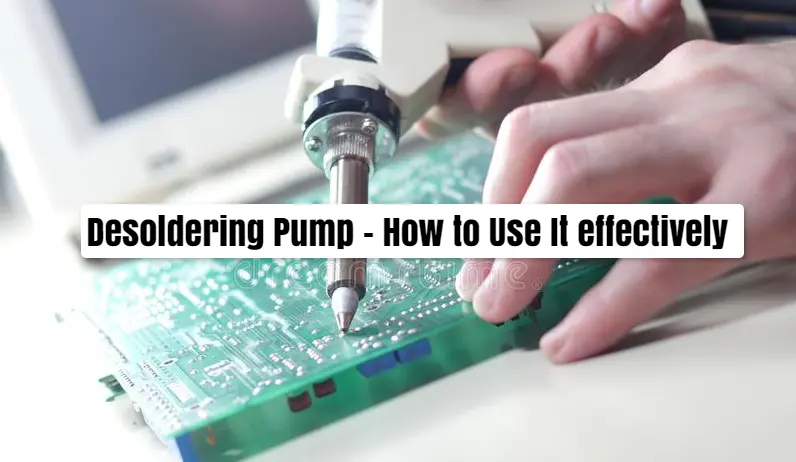
Desoldering Pump
A desoldering pump is a mechanical device popularized as a solder sucker. This tool is used for removing the solder from a printed circuit board. You can find it in a convenient design comprising a trigger, a head, and an unlock button. The purpose of desoldering a PCB is to make this board receptive to other elements that you want to include on the board after removing the current ones from it. Desoldering is a repairing method where the faulty connections or elements are removed and replaced with high-quality ones.
Generally, desoldering pumps are available in two styles – one is called a plunger, and the other is bulb style. The process of sucking the solder off the PCB differs in these styles, so they are considered to employ according to the board’s design demand. If the space is large enough, the plunger can work faster; else bulb is considered good.
Desoldering pump are significant contingents of a PCB designer’s tool-kit. So, let’s find out how one can use these effectively to get the desired results. Even before learning the usage, let’s take a quick walk-through of the definition of desoldering pumps and their utility.
What is a Desoldering Pump?
If we consider its structure, a desoldering pump is nothing but a pen-like or syringe-type tool that starts to work when its trigger button is put on. It is a handy tool that allows the user to desolder a PCB and remove all the current connections on it with extra finesse. Thus, the PCB is ready for experimentation with other elements that can yield a better solution than the existing one.
Desoldering is done to fix a faulty connection and to replace it with a sound one. It helps achieve important purposes like repair, salvage a device’s function, replace faulty connection, or troubleshoot any problem that any device faces. When all the initial checks like switch functioning do not work, the repairers move to check the PCB. They find the faulty part, suck its soldering with a desoldering pen or solder sucker and then try to put the device back into working mode by adding a functional element.
How to Use a Desoldering Pump
The Desoldering pump makes the repairing process relatively easy. Here are the essential steps you ought to learn to use a desoldering tool.
- Apply the heat on the PCB with the help of a soldering rod. Some of the desoldering pumps are equipped with the soldering rods, too, so the single device serves the dual purpose of soldering or desoldering a PCB.
- In the plunger style desoldering pump, the user puts pressure on the plunger by pressing it slightly. When using the bulb-design desoldering pump, the soldered portion is squashed with the help of a bulb.
- In both these cases, the solder liquefies by the heat generated in the process. Then, the pump is placed on the soldered point to start the removal process.
- Once placed correctly, the bulb or plunger, depending upon the desoldering pump’s working mechanism, is released. If a solder sucker has a release button, it does not require holding the button throughout the process. Just click it, and you are done with the releasing part.
- Step 4 pulls off the soldering from the PCB or circuit board and deposits in the sucker. So, now you require removing the freed solder from the pump. Depending upon the requirement, the user may require to do sucking the soldering process repeatedly.
- Cleaning the removed solder from the pump is not an intricate process at all. You can press down and release the plunger continuously to clean the solder from the sucking tool.
- Usually, it is not possible to suck only the required solder from the PCB joint. Since the solder is in a blob form due to liquefaction, it may come off more than required. Thus, adding the solder in an extra amount to the joint is required to cover the deficit.
Ease of use is one of the most significant advantages that the solder sucker offers. However, there are certain disadvantages too. Let’s take a look at the advantages of disadvantages of the desoldering pump in the coming sections.
Also read:- Difference Between 2 layer pcb vs 4 Layer pcb
Advantages of using a desoldering pump
The Desoldering pumps are small pen-like tools. This design fits the small sized pieces like PCB joints that are not more than microscopic in some cases. Thus, such small sucking points become comfortable with the desoldering pump design created only for the minuscule size surfaces. To sum up, the desoldering pump offers benefits, such as:
- Eases the process of troubleshooting or repairing the defective part by allowing them to go to the root cause of the problem.
- When equipped with heating guns, it eliminates the need to use a separate tool for liquefying solder and desoldering the board. Thus, the process becomes quicker and reduces the chances of error too. The user is not required to keep track of where liquefication was done when the same tool is doing both liquifying and sucking jobs.
- Its design is best suited for tiny spaces. Therefore, the user finds the desoldering process very less straining to eyes. One can expect more repairs done in the given time when such handy tools are used for the process.
- The Desoldering pumps do not damage the whole PCB. The users can re-employ the used PCBs for other processes. It helps in extracting the best use of the PCBs that are anyway priced quite heavily. Desoldering pumps make it possible to salvage the used kits and make the whole process of designing the device interiors entirely sustainable.
- The sustainability feature indicates the possibility of recycling the PCBs for different devices, which means maximum use, minimum wastage, and, finally, quite reduced burden on the cities’ waste-fills.
Disadvantages of using a desoldering pump
The only disadvantage lies in the bulb-like design. Since the present-day PCBs are made ultra-small in size to make the devices space-efficient, it may lead to difficulty accessing some tinier areas and need a very fine tip for the solder sucking process. The bulb-like tip, though very small, still proves to be bigger for such microscopic small spaces.
How to Desolder a Circuit Board
Why would anyone need to desolder a circuit board? One of the needs has already been explained in the above sections, where it is stated that the users might need to remove the faulty parts. The other reason might be to restore the use of high-quality parts missing in the new device’s PCBs.
Whatever the reason is, the process of desoldering a circuit board is a tedious task. It requires a firm hand, sharp vision, and the use of handy tools like a solder sucker. Apart from understanding the tools’ requirements, the users must be aware of the following challenges they might encounter during the desoldering process. So, when you desolder a circuit board, make a note of the following points:
- Cover the eyes and nose adequately: While desoldering a circuit board, you must keep your eyes, nose, and mouth well-shielded. The process involves the risk of contacting the lead, which is found in many solders. Thus, protection from lead vapors is essential for carrying out the desoldering process safely.
- Do the desoldering quickly: Since the PCB is exposed to the high temperature required for converting the soldered part into a liquid blob, the risk of damaging the board increases if desoldering is done slowly. Continuous heating the board for longer durations can damage the PCB, making it unsuitable for any use.
- Keep a rework station handy: Through-hole mounted parts, and compactly designed PCBs may require reworking on specific points when the desoldering part is over. Thus, keeping a rework station handy and functional helps retain the functional value of parts that remain soldered after the desoldering process. A little bit of touch-up in the form of soldering the other parts has to be done quickly to prevent the occurrence of any other kind of error. This is why; the reworking station is to be arranged.
Procedures in desoldering a circuit board
Experts need to follow these steps to carry out the procedure of desoldering a circuit board. Before moving on to the steps involved, you must know how the experts carry out the desoldering process. When using the desoldering pumps, there are two types of methods involved. In the first method, the tool works by sucking up the solder, which is why the tool used for it is called the suction desoldering pumps. In another way, the hot air pumping is done to melt away the complete solder done on a surface. The hot air blowing is done to achieve partial soldering of PCB. In this process, desoldering is done using a vacuum pump or tweezer, and once the soldering solidifies, it is allowed to remain as such.
Also read:- Wave Soldering Process
Let’s take a look at the essential procedures involved:
Selecting a good soldering iron
As mentioned earlier, this step may not be required for those desoldering pumps that come fitted with ironing heads. In other types of solder suckers, one must pick a good quality soldering iron. You must select those soldering iron that comes with a digital temperature displaying screen. Further, these should have flexible wiring or cabling for smoother movements. And finally, you must ensure the tip is clean; otherwise, it may bring down the iron’s conduction property or performance.
It is worth noticing that high-quality soldering iron is invariably costlier. So, if you are buying a more dependable soldering iron, be ready to pay extra amounts. The efficiency and the performance, and most importantly, the longevity of such high-quality soldering irons make up for the high price tag. Experts become comfortable with their tools while using these regularly. So, they may not like the idea of changing these too often. Soldering iron also belongs to the same category of tools people prefer to stick to for longer times. That is why a high price does not pinch much.
Acquiring a suitable holder for the circuit board
Since you are dealing with tiny size space and need a high level of precision while handling the joints, it is imperative to have a holder that keeps the circuit board in place. Many users consider building the holder by themselves, but there is no match for the one built by reputed manufacturers. Since the idea is to do the process fast, correctly, and efficiently in an error-free manner, the holder does hold a lot of importance, and it should be bought with added caution.
Use solder in justified quantities
The solder makes the process of removing the component from the board quite quickly. So, when you are using it in optimal amounts, you are quickening removing the component or desoldering the board. If more solder is used, it may require a high temperature to melt and more time to solidify. Thus, the chances of damaging the PCB increase when the solder amount is not used wisely.
So, choose the solder amount depending upon the complexity of the PCB. When more components are to be taken off, more solder is required as it helps maintain the high temperature and liquid state, which are required for easy and fast removal.
Be really quick
Since you would not want to overexpose yourself or for too long to lead vapors, you must be able to carry out the desoldering process quickly. The quickness comes with practice, remember!
Most importantly, detach the circuit board
When you carry out the desoldering process, it is essential to do it in a well-aired space. Instead of struggling inside the device, take the PCB out or detach it to have better space for movement and quick desoldering.
Conclusion
Barring a disadvantage that does not significantly impact, it is safe to say that desoldering pumps are the perfect fit for the process. With knowledge of materials and processes and constant practice, you can derive the best use of these handy pumps and offer troubleshooting support of high quality to your clients.